Trezor.io/Start – Official Setup for Your Trezor Hardware Wallet
Trezor.io/Start is the official and most secure way to begin setting up your Trezor hardware wallet. Whether you have purchased the Trezor Model T or the Trezor One, this guided process ensures that you complete your device initialization correctly and safely. With Trezor, your private keys remain offline and encrypted, giving you complete control over your digital assets. Following the official setup steps helps protect you against phishing scams, unauthorized access, and counterfeit third-party software pretending to be Trezor.
This setup page is designed for beginners, experienced users, and digital asset holders who want maximum protection for their portfolios. As cryptocurrencies grow in value and popularity, the importance of storing them securely becomes more critical. Trezor ensures that your private keys are kept offline, away from online threats such as malware, viruses, and fraudulent websites. Through the Trezor.io/Start onboarding process, you will install Trezor Suite, initialize your hardware wallet, create a recovery seed, set a secure PIN, and begin managing assets confidently.
1. Connect Your Trezor Device
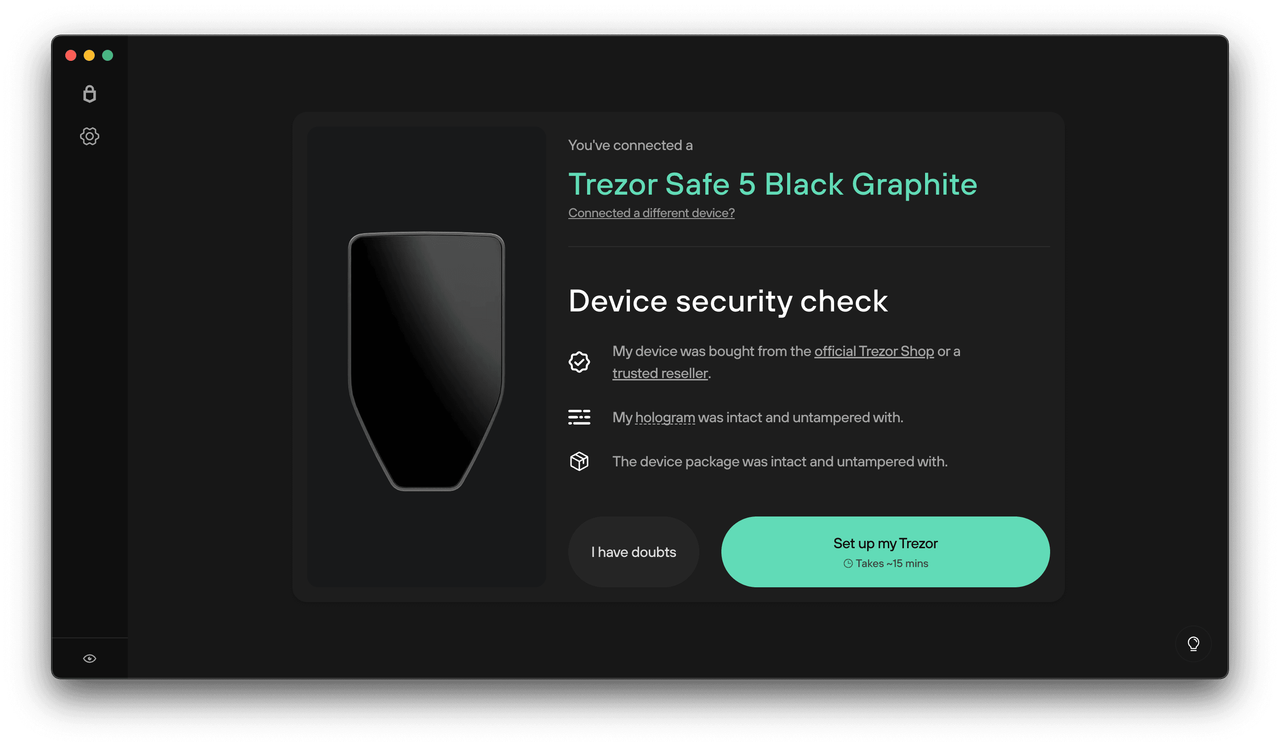
Begin by unboxing your device and confirming that the holographic security seal was intact before opening it. Use the USB cable to connect your Trezor to your computer. Once connected, your browser or Trezor Suite will detect the device and display setup instructions. Always check that you are on the official URL to avoid phishing threats. Trezor never asks for your recovery seed online, and you should never share it with anyone.
2. Install Trezor Suite
Trezor Suite is the official application for managing your hardware wallet. Download it only from the official Trezor website. Trezor Suite offers advanced portfolio monitoring, secure transaction signing, privacy-enhanced features, and the ability to control multiple cryptocurrency accounts. Keeping your Suite updated is essential, as updates include new security enhancements and feature improvements.
3. Install or Update Firmware
During the initial setup, you may be prompted to install the latest firmware or update an existing version. Firmware upgrades include stronger security measures and performance improvements. Only approve firmware updates that are confirmed on your device screen. This dual-verification system guarantees that no unauthorized action occurs behind the scenes.
4. Create Your Recovery Seed
The recovery seed is the most important part of your hardware wallet. It contains 12, 18, or 24 unique words generated offline by your device. Write these words down carefully and never store them digitally. Do not take photos, screenshots, or save them on cloud storage. If anyone gains access to your recovery seed, they can take full control of your assets. Store it in a secure, offline place separate from your device.
5. Set Your Secure PIN
A PIN is required to access your Trezor device. The PIN layout on your computer is randomized each time to protect against keyloggers or screen-tracking software. This unique security feature ensures that your device is protected, even if your computer is compromised. Choose a strong PIN that cannot be easily guessed.
6. Begin Managing Your Crypto
After completing the setup steps, you can use Trezor Suite to manage transactions, track portfolio value, and access multiple cryptocurrency accounts. Trezor supports Bitcoin, Ethereum, stablecoins, and hundreds of additional assets. Every transaction requires physical confirmation on the device, ensuring complete user control and unmatched safety.
Security Recommendations
• Never share your recovery seed. • Double-check the website URL. • Only download software from official sources. • Store your recovery seed offline and away from others. • Enable all recommended privacy settings in Trezor Suite.